Java Spring Basic Authentication Example
- Details
- Written by
- Last Updated on 27 April 2020 | Print Email
In this tutorial, you will learn to secure webpages in a Spring Boot application using Spring Security APIs. The authentication method to be used is HTTP Basic with credentials are user details stored in memory. In other words, how to quickly add simple login function for a Java web application based on Spring framework, without creating login form.
Using HTTP Basic authentication with in-memory users is suitable for applications that require only simple security which can be implemented quickly.
The Spring security code in this tutorial is built on top of the codebase of the project described in the tutorial: Spring Boot CRUD Example with Spring Data JPA. So to follow this tutorial, go to download the sample project that tutorial.
1. Understand HTTP Basic Authentication
Let's understand some key characteristics of HTTP basic authentication. It is one of the standard authentication mechanisms defined by HTTP specification. The web browser provides a login dialog box that requires the users to enter username and password, which is sent to the server via HTTP headers. No cookies or sessions are used.
In HTTP basic authentication, the credentials are weakly encoded using Base64 encoding algorithm which is easily reversible. That means this method is not secured, unless used in conjunction with HTTPS.
And note that, there's no explicit logout with HTTP basic authentication. To force logout, you must exit the browser.
2. Declare Spring Security Dependency
To use Spring Security APIs, add the following dependency declaration in the project's Maven build file:
<dependency> <groupId>org.springframework.boot</groupId> <artifactId>spring-boot-starter-security</artifactId> </dependency>
If Spring Security jar files are present in the classpath, the default authentication method is form-based with a prebuilt login form provided. But we will be using HTTP Basic authentication instead.
3. Configure HTTP Basic Authentication with in-memory users
Now, we want to secure all pages of the ProjectManager application (download here). Create the WebSecurityConfig class with the following code:
package net.codejava; import org.springframework.context.annotation.Configuration; import org.springframework.security.config.annotation.authentication.builders.AuthenticationManagerBuilder; import org.springframework.security.config.annotation.web.builders.HttpSecurity; import org.springframework.security.config.annotation.web.configuration.EnableWebSecurity; import org.springframework.security.config.annotation.web.configuration.WebSecurityConfigurerAdapter; import org.springframework.security.crypto.bcrypt.BCryptPasswordEncoder; @Configuration @EnableWebSecurity public class WebSecurityConfig extends WebSecurityConfigurerAdapter { @Override protected void configure(AuthenticationManagerBuilder auth) throws Exception { auth.inMemoryAuthentication() .passwordEncoder(new BCryptPasswordEncoder()) .withUser("namhm") .password("...") .roles("USER") .and() .withUser("admin") .password("...") .roles("ADMIN") ; } @Override protected void configure(HttpSecurity http) throws Exception { http.authorizeRequests() .anyRequest().authenticated() .and() .httpBasic(); } } Note that this class must be annotated with the @EnableWebSecurity annotation and overrides a couple of configure() methods from its superclass WebSecurityConfigurerAdapter.
The first method is to create in-memory users:
@Override protected void configure(AuthenticationManagerBuilder auth) throws Exception { auth.inMemoryAuthentication() .passwordEncoder(new BCryptPasswordEncoder()) .withUser("namhm") .password("$2a$10$fCY89aAmJCp9kQ5Ejz0HveVzKSBCyGVk6YmgqSp2uzL2kqwJD/zCm") .roles("USER") .and() .withUser("admin") .password("$2a$10$K65x7/TZEpXlnDGBZSC.5u0R.iO7U1CbkZ.VIIKjSkY8uOBNmeqzK") .roles("ADMIN") ; } Here, we create two users namhm and admin with passwords encoded in BCrypt format because raw passwords are not recommended. BCrypt is a strong hashing algorithm recommended by Spring Security.
You can create a simple program to generate BCrypt password as follows:
package net.codejava; import org.springframework.security.crypto.bcrypt.BCryptPasswordEncoder; public class SecuredPasswordGenerator { public static void main(String[] args) { BCryptPasswordEncoder encoder = new BCryptPasswordEncoder(); String rawPassword = "nimda"; String encodedPassword = encoder.encode(rawPassword); System.out.println(encodedPassword); } } And in the second method:
@Override protected void configure(HttpSecurity http) throws Exception { http.authorizeRequests() .anyRequest().authenticated() .and() .httpBasic(); } With this configuration, all requests must be authenticated using HTTP basic authentication method.
To display username of the logged in user, add the following code to the beginning of every HTML page:
<h3 th:inline="text">Welcome [[${#httpServletRequest.remoteUser}]]</h3> Next, start the Spring Boot application to test.
4. Test Login and Logout
Open the web browser to access the application at http://localhost:8080, you will see the browser presents a login dialog box that looks like this:
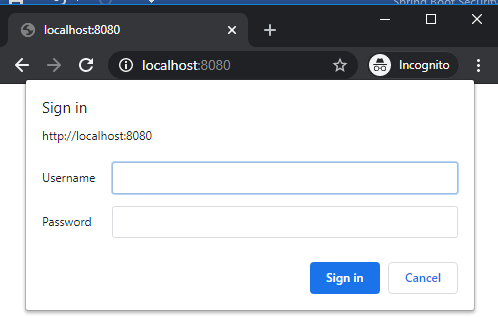
This dialog may look slightly different in different browsers. Enter username is namhm and password is codejava, and click Sign in. Once authenticated successfully, the home page appears:
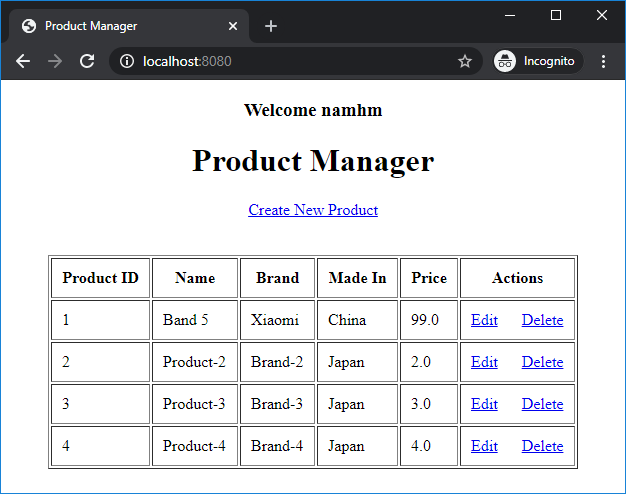
You can see, it displays "Welcome namhm" – username of the logged in user.
To logout, you must exit the browser.
5. Bonus: Code Authorization
Let's go further beyond basic authentication. Now we want to authorize users based on their roles, and every one can see the home page (not secured). Only users having ADMIN role can edit and delete products, and users having either USER or ADMIN role can create new product.
So update the second method in the WebSecurityConfig class as follows:
@Override protected void configure(HttpSecurity http) throws Exception { http.authorizeRequests() .antMatchers("/").permitAll() .antMatchers("/new").hasAnyRole("USER", "ADMIN") .antMatchers("/edit/*", "/delete/*").hasRole("ADMIN") .anyRequest().authenticated() .and() .httpBasic() .and() .exceptionHandling().accessDeniedPage("/403"); } Here, we also specify a custom error page for the HTTP status 403 – in case the user is not authorized. Code of this custom error page may be as simple as follows:
<!DOCTYPE html> <html> <head> <meta charset="ISO-8859-1"> <title>Access Denied</title> </head> <body> <h2>Sorry, you don't have permission!</h2> </body> </html>
Of course you need to configure Spring MVC view resolver accordingly so the /403 URL will be resolved to the HTML file 403.html.
You may want to have more granularity for authorization, such as only users having ADMIN role can see Edit and Delete links. So you need to use Thymeleaf integration with Spring Security.
Declare the following dependency for the project:
<dependency> <groupId>org.thymeleaf.extras</groupId> <artifactId>thymeleaf-extras-springsecurity5</artifactId> </dependency>
And specify the XML namespace in HTML files as follows:
<html xmlns:th="http://www.thymeleaf.org" xmlns:sec="https://www.thymeleaf.org/thymleaf-extras-springsecurity5">
Then you can control what to be shown based on user's role. For example:
<div sec:authorize="hasRole('USER')"> <h3 th:inline="text">Welcome [[${#httpServletRequest.remoteUser}]]</h3> </div> This means only users having USER role can see welcome message. And only users having either USER or ADMIN role can see the Create New Product link:
<div sec:authorize="hasAnyRole('USER', 'ADMIN')"> <a href="/new">Create New Product</a> </div>Conclusion:
So that you have learned how to secure a Spring Boot application using HTTP basic authentication method with in-memory users. You also learned how to implement simple role-based authorization. You see, Spring framework makes it very easy to secure Java web applications. And you can download the sample project below.
You can also watch the video version of this tutorial here:
Related Spring Security Tutorials:
- Spring Boot Security Customize Login and Logout
- Spring Boot Security Form Authentication with in-memory users
- Spring Boot Security Form Authentication with JDBC and MySQL
- Spring Boot Security Authentication with JPA, Hibernate and MySQL
- Spring Boot Security Role-based Authorization Tutorial
Other Spring Boot Tutorials:
- Spring Boot automatic restart using Spring Boot DevTools
- Spring Boot Form Handling Tutorial with Spring Form Tags and JSP
- How to create a Spring Boot Web Application (Spring MVC with JSP/ThymeLeaf)
- Spring Boot - Spring Data JPA - MySQL Example
- Spring Boot Hello World RESTful Web Services Tutorial
- How to use JDBC with Spring Boot
- Spring Boot CRUD Web Application with JDBC - Thymeleaf - Oracle
- Spring Boot RESTful CRUD API Examples with MySQL database
- How to package Spring Boot application to JAR and WAR
About the Author:
 Nam Ha Minh is certified Java programmer (SCJP and SCWCD). He started programming with Java in the time of Java 1.4 and has been falling in love with Java since then. Make friend with him on Facebook and watch his Java videos you YouTube.
Add comment
Source: https://www.codejava.net/frameworks/spring-boot/http-basic-authentication-with-in-memory-users
0 Response to "Java Spring Basic Authentication Example"
Post a Comment